

Microwave baking pans, including the microwave grill pan, offer remarkable versatility in the kitchen. These pans streamline cooking processes, allowing for quicker meal preparation. They serve not only for baking but also for a variety of creative culinary tasks. Whether one wants to steam vegetables or whip up a quick dessert, these pans can enhance efficiency. Utilizing a microwave grill pan can elevate cooking techniques, so it’s essential to know how to choose a microwave grill pan that suits your needs. For effective use, refer to a baking pan usage guide and adopt some microwave baking tips for optimal results. Additionally, don’t forget to follow baking pan cleaning tips and ensure proper microwave grill pan cleaning to maintain their longevity.
Key Takeaways
- Microwave baking pans save time and enhance cooking efficiency, allowing for quick meal preparation and a variety of dishes.
- Use microwave baking pans to create delicious desserts like mug cakes and brownies in under five minutes, perfect for satisfying sweet cravings.
- Steaming vegetables in microwave baking pans preserves nutrients and colors, making it a healthier cooking method compared to boiling.
- Experiment with one-pot meals and casseroles in microwave baking pans for easy cleanup and flavorful results, ideal for busy weeknights.
- Utilize microwave grill pans for healthier cooking options, achieving grilled flavors without the need for outdoor grilling.
Baking Delicious Desserts
Microwave baking pans excel at creating delicious desserts quickly and efficiently. They allow home cooks to whip up sweet treats without the need for extensive preparation or lengthy baking times. Here are some popular dessert options that can be made using these versatile pans:
- Easy Microwave Chocolate Mug Cake
- Microwave Baked Apples
- Mocha Truffles
- PB and J Mini Mug Cakes
- Fudgy Nutella Mug Cake
- Individual Microwave Brownie
- Microwave Apple Crisp
These desserts not only satisfy sweet cravings but also save time. Most microwave dessert recipes cook in less than five minutes. For instance, mug cakes typically cook in just two minutes or less, making them an ideal choice for a quick indulgence.
To illustrate the efficiency of microwave baking pans, consider the following table showcasing average preparation and cooking times for various desserts:
| Recipe Name | Prep Time | Cook Time | Total Time |
|---|---|---|---|
| 5-Minute Microwave Cake Recipe | 5 minutes | 5 minutes | 10 minutes |
| Easy Microwave Chocolate Mug Cake | N/A | 2 minutes | N/A |
| Love Mug Cakes? Try These 7 Quick… | N/A | < 5 mins | N/A |
Using a microwave grill pan can enhance the texture of certain desserts, providing a delightful finish. Whether baking a cake or preparing a quick treat, these pans simplify the process while delivering satisfying results.
Quick Cakes
Microwave baking pans make it easy to create quick cakes that satisfy sweet cravings without lengthy preparation. These pans allow home cooks to experiment with various cake types, including:
- Microwave mug cakes
- Brownies
- Various puddings
Each of these options provides a delightful treat in a fraction of the time required for traditional baking. For instance, a microwave mug cake can be ready in under five minutes, making it an ideal choice for those busy days.
The texture of cakes baked in microwave baking pans often surprises many. They typically exhibit better springiness, higher moisture content, and a firmer structure compared to cakes baked in conventional ovens. This unique texture enhances the overall eating experience, making quick cakes not just fast but also delicious.
To maximize the benefits of using a microwave grill pan, consider the following tips:
Tip: Always check the wattage of your microwave. Cooking times may vary based on the power level, so adjust accordingly for the best results.
Additionally, using a microwave baking pan allows for even cooking, ensuring that cakes rise uniformly. This feature is particularly beneficial when preparing multiple servings at once.
Mug Brownies
Mug brownies offer a quick and satisfying dessert option for chocolate lovers. These delightful treats require minimal ingredients and can be prepared in just a few minutes. Using a microwave baking pan, home cooks can create rich, fudgy brownies that are perfect for satisfying sudden cravings.
To make mug brownies, gather the following ingredients:
| Ingredient | Amount |
|---|---|
| All-purpose flour | 1/4 cup |
| Granulated sugar | 1/4 cup + 1 teaspoon |
| Cocoa powder | 2 tablespoons |
| Kosher salt | Pinch |
| Espresso powder (optional) | Pinch |
| Water | 1/4 cup |
| Grapeseed/vegetable oil or melted butter | 2 tablespoons |
| Pure vanilla extract | 1/8 teaspoon |
| Whipped cream or ice cream (optional) | dollop/small scoop |
The preparation process is straightforward. Combine all dry ingredients in a microwave-safe mug or baking pan. Then, add the wet ingredients and mix until smooth. Microwave the mixture for about one minute, checking for doneness. The brownie should be set but still moist in the center.
The total time for preparing and cooking mug brownies is approximately six minutes, broken down as follows:
| Prep Time | Cook Time | Total Time |
|---|---|---|
| 5 minutes | 1 minute | 6 minutes |
Mug brownies are not only quick to make but also customizable. Cooks can add chocolate chips, nuts, or even a swirl of peanut butter for extra flavor. Using a microwave grill pan can enhance the texture, providing a slightly crispy edge while keeping the center gooey.
These brownies serve as an excellent option for a late-night snack or a quick dessert after dinner. With minimal cleanup and maximum satisfaction, mug brownies are a must-try for anyone looking to enjoy a sweet treat in no time.
Steaming Vegetables
Steaming vegetables in microwave baking pans offers a quick and efficient way to prepare healthy side dishes. This method preserves the vibrant colors and crisp textures of vegetables while retaining essential nutrients. Research indicates that steaming and microwaving effectively maintain the nutritional value of vegetables. For instance, spinach and chard experience minimal loss of vitamin K when microwaved. Broccoli retains significant levels of both vitamin C and K, making these vegetables excellent choices for nutrient retention.
To steam vegetables using a microwave baking pan, follow these simple steps:
- Prepare the Vegetables: Wash and chop the vegetables into uniform pieces to ensure even cooking.
- Add Water: Place a small amount of water in the microwave baking pan. Typically, 2-3 tablespoons suffice.
- Cover the Pan: Use a microwave-safe lid or plate to cover the pan. This traps steam and helps cook the vegetables evenly.
- Microwave: Cook on high for 2-5 minutes, depending on the type and quantity of vegetables. Check for doneness and adjust the time as needed.
Steaming vegetables in microwave baking pans has several advantages over boiling or roasting. Compared to boiling, both microwaving and steaming are gentler cooking methods. They help reduce nutrient loss significantly. Microwaving uses quick heat and minimal water, preserving sensitive vitamins effectively. Steaming employs indirect heat, maintaining the texture and color of vegetables while protecting essential nutrients. Shorter cooking times and limited water exposure are vital for retaining vitamins and antioxidants.
Incorporating steamed vegetables into meals enhances nutrition and adds flavor. Whether serving them as a side dish or mixing them into salads, steamed vegetables provide a healthy boost to any meal.
Healthy Side Dishes
Microwave baking pans offer a quick and efficient way to prepare healthy side dishes. Cooking in the microwave preserves nutrients better than some traditional methods. This advantage makes it a convenient option for those seeking nutritious meals without extensive preparation.
Here are some healthy side dish ideas that can be easily prepared using microwave baking pans:
- Watermelon Feta and Mint Quinoa Salad: A refreshing combination of quinoa, watermelon, and feta.
- Wild Rice Pilaf with Butternut Squash: A warm dish featuring wild rice and roasted vegetables.
- Apricot & Edamame Quinoa Salad: A nutritious salad packed with antioxidants.
- Israeli Quinoa Salad: A Mediterranean-inspired salad with quinoa, cucumber, tomatoes, and onion.
- Harvest Grain Salad: A mix of quinoa, fresh vegetables, nuts, and dried fruit.
- Sweet Potato Fries: A healthier alternative to traditional fries, made crispy in the oven.
- Garlic Broccoli: A low-calorie vegetable side that pairs well with any protein.
Using microwave baking pans allows for steaming vegetables and precooking items without added fats. This method helps preserve nutrients while minimizing fat usage during cooking. Cooking with microwaves often requires little to no water, which reduces nutrient leaching and the need for fats.
Incorporating these healthy side dishes into meals enhances nutrition and adds variety. Whether serving them alongside grilled chicken or as part of a vegetarian platter, these dishes provide a delicious and health-conscious option for any dining occasion.
Embrace the versatility of microwave baking pans and enjoy the benefits of quick, nutritious cooking.
Flavorful Seasoning Tips
Seasoning plays a crucial role in elevating the taste of microwave-cooked dishes. Using the right herbs and spices can transform a simple meal into a flavorful experience. Here are some effective seasoning techniques to enhance flavor in your microwave creations:
- Fresh Herbs: Incorporate fresh herbs like chervil, Italian parsley, thyme, tarragon, oregano, dill, or rosemary. These herbs add vibrant flavors and aromas to dishes.
- Dried Herbs: When using dried herbs, opt for tarragon, thyme, or oregano. Use them at 1/3 to 1/2 the amount of fresh herbs. Add dried herbs early in the cooking process to allow their flavors to develop fully.
To maximize flavor, consider the following tips:
Tip: Always taste your dish as it cooks. Adjust seasoning gradually to avoid overpowering the natural flavors of the ingredients.
When preparing vegetables, sprinkle them with a pinch of salt and a drizzle of olive oil before microwaving. This simple step enhances their natural sweetness and adds depth to the overall flavor.
For proteins, marinating them in a mixture of herbs, spices, and a bit of acid, such as lemon juice or vinegar, can yield delicious results. Allow the proteins to marinate for at least 15 minutes before cooking. This technique infuses the meat with flavor and keeps it moist during cooking.
Lastly, don’t forget about seasoning blends. Pre-made blends like Italian seasoning or Cajun spice can save time and add complexity to your dishes. Just a teaspoon can make a significant difference in flavor.
By applying these seasoning tips, cooks can create mouthwatering meals in their microwave baking pans, ensuring every dish is both quick and delicious.
Reheating Leftovers
Reheating leftovers in microwave baking pans offers a quick and efficient method to enjoy previously cooked meals. This approach not only saves time but also enhances food safety. Microwaving can reduce the formation of harmful compounds that may occur with high-heat cooking methods. Ensuring even heating in microwaves is crucial to minimize the risk of food poisoning.
To effectively reheat leftovers, follow these steps:
- Use a Microwave Baking Pan: Choose a microwave-safe baking pan to ensure even heating. A microwave grill pan can help achieve a better texture for certain foods.
- Cover the Food: Use a microwave-safe lid or plate to cover the pan. This traps steam and helps heat the food evenly.
- Adjust Power Levels: Set the microwave to medium power. This setting allows for gradual heating, reducing the chances of hot spots that can lead to uneven cooking.
- Check Temperature: Use a food thermometer to ensure the internal temperature reaches at least 165°F (74°C). This temperature is essential for food safety.
While reheating on the stove provides better control over heat, it can take longer. Adding oil or water when reheating on the stove can help maintain moisture and prevent burning. However, the microwave remains a convenient option for those in a hurry.
Even Heating Techniques
Achieving even heating in microwave baking pans is essential for optimal cooking results. Several techniques can enhance the uniformity of heat distribution, ensuring that food cooks thoroughly without hot or cold spots.
- Moisture Retention Techniques: Adding a small amount of water on top of the batter helps prevent drying out during cooking. This moisture creates steam, which aids in even cooking.
- Strategic Ingredient Placement: When preparing batters, place denser ingredients at the edges of the pan. Lighter components should go in the center. This arrangement promotes uniform cooking, as the edges tend to heat faster.
- Covering and Venting: Use a microwave-safe lid or cover to retain moisture while allowing steam to escape. Proper venting prevents sogginess and ensures that food cooks evenly.
- Microwave Power Levels: Adjusting the power settings on the microwave can significantly impact cooking results. Lower power levels allow for gentler heating, which can help achieve better baking outcomes.
The design of microwave baking pans also contributes to even heat distribution. These pans are constructed from materials that are safe for microwave use and specifically engineered to facilitate uniform heating throughout the food. Their shape and material help to distribute heat evenly, reducing the risk of overcooked edges and undercooked centers.
By employing these techniques, cooks can maximize the efficiency of their microwave baking pans. Even heating not only enhances the quality of the food but also ensures a more enjoyable dining experience.
Embracing these methods will lead to consistently delicious results, making microwave baking pans an invaluable tool in any kitchen.
Preventing Sogginess
Sogginess often plagues microwave-cooked foods, particularly when using baking pans. Research indicates that moisture accumulation near the food surface contributes to this issue. The air inside the microwave remains at room temperature, preventing moisture from evaporating effectively. To combat this problem, cooks can implement several strategies.
- Use Dry Paper Towels: Wrapping foods like sandwiches and bread rolls in a dry paper towel absorbs excess moisture during heating. This simple step can significantly improve texture.
- Avoid Excess Flour: When preparing meat, avoid coating it with flour if adding liquid. This practice can lead to sogginess, as the flour absorbs moisture and creates a wet coating.
- Incorporate Parchment Paper: Placing parchment paper underneath or wrapping food in it helps maintain crispness. This method allows steam to escape while keeping the food’s surface dry.
By following these tips, cooks can enhance the quality of their microwave-baked dishes. Implementing these techniques not only prevents sogginess but also improves overall flavor and texture.
In addition to these methods, consider the type of food being prepared. Foods with high moisture content, such as vegetables, may require special attention. For instance, steaming vegetables in a microwave baking pan can lead to excess moisture. To mitigate this, ensure proper venting by covering the pan loosely. This approach allows steam to escape while still cooking the vegetables evenly.
By adopting these practices, cooks can enjoy delicious, non-soggy meals prepared in microwave baking pans. With a little attention to detail, they can achieve optimal results and elevate their cooking experience.
Making One-Pot Meals
Microwave baking pans simplify the preparation of one-pot meals, allowing cooks to create delicious dishes with minimal effort. These meals combine various ingredients into a single pan, reducing cleanup time and maximizing flavor. The microwave’s efficiency ensures that meals cook quickly, making it an ideal option for busy individuals.
Several one-pot meal ideas can be easily prepared using microwave baking pans. Here are some popular options:
| Meal Name | Description |
|---|---|
| Omelet in a Mug | A quick and easy breakfast option that can be made in a mug in the microwave. |
| Prawn Biryani | A flavorful rice dish cooked in prawn curry, easy to prepare in the microwave. |
| Basic Microwave Risotto | A simplified version of risotto that requires less stirring and can be made in the microwave. |
| Cindy’s Microwave Chicken Parmesan | A moist chicken dish that is easy to prepare and clean up, perfect for a family meal. |
| Ranch Chicken Tacos | A recipe utilizing leftover chicken, with tortillas softened in the microwave. |
To prepare these meals, cooks should follow a few simple steps. First, gather all ingredients and place them in the microwave baking pan. Next, cover the pan with a microwave-safe lid or plate to retain moisture. Finally, set the microwave to the appropriate power level and cook according to the recipe instructions.
One-pot meals not only save time but also allow for creativity in the kitchen. Cooks can experiment with different ingredients and flavors, tailoring each dish to their preferences. The versatility of microwave baking pans makes them an essential tool for anyone looking to streamline their cooking process while enjoying hearty, satisfying meals.
By embracing the convenience of one-pot meals, home cooks can enjoy nutritious and delicious dishes without the hassle of extensive preparation or cleanup.
Casseroles in Minutes
Microwave baking pans revolutionize the preparation of casseroles, allowing cooks to create hearty meals in a fraction of the time. With the right ingredients and techniques, anyone can enjoy delicious casseroles ready in minutes. Here are some popular casserole options that can be prepared quickly:
- Tuna Noodle Casserole: A modern twist featuring artichokes and capers, ready in under 15 minutes.
- Lasagna: This quick version takes less than 25 minutes without the need for pre-cooking ingredients.
- Beef Casserole: A hearty dish made with tender beef, mushrooms, and shallots, also ready in under 15 minutes.
- Chicken Kiev Casserole: This casserole features chicken tenders in a creamy sauce with broccoli, topped with crispy panko.
- Chicken Marsala Casserole: This dish uses onion dip mix for flavor and cooks at a lower power for juicy results.
The taste and texture of microwave casseroles can rival those baked in traditional ovens. For instance, using a Deep Covered Baker (DCB) for microwaving chicken often results in tender and juicy meat. The DCB’s stoneware material enhances cooking quality by providing even heat distribution and moisture retention. This feature is crucial for achieving a well-cooked casserole.
Additionally, the DCB retains heat longer, ensuring that the casserole remains warm and flavorful. Cooks can enjoy the convenience of quick preparation without sacrificing taste or quality. Embracing microwave baking pans for casseroles not only saves time but also delivers satisfying meals that the whole family will love.
Layering Ingredients
Layering ingredients in microwave baking pans can significantly enhance the flavor and texture of dishes. This technique allows for even cooking and better distribution of flavors. Here are some effective ways to layer ingredients for optimal results:
- Start with a Base: Begin with a layer of grains or pasta. This base absorbs flavors from the ingredients above and provides a hearty foundation.
- Add Proteins: Place proteins such as chicken, beef, or tofu on top of the base. This positioning allows the juices from the proteins to seep down, infusing the grains with flavor.
- Incorporate Vegetables: Layer vegetables next. Choose a mix of colorful options like bell peppers, zucchini, and carrots. These not only add nutrients but also create visual appeal.
- Season Generously: Sprinkle herbs and spices between layers. This technique ensures that each ingredient receives adequate seasoning, enhancing the overall taste.
- Finish with a Topping: Top the dish with cheese or breadcrumbs for added texture. This layer can create a delightful crust when microwaved.
Tip: Use microwave-safe lids or covers to trap steam while cooking. This method helps maintain moisture and ensures even cooking throughout the dish.
Here’s a simple example of a layered dish that can be prepared in a microwave baking pan:
| Layer | Ingredients |
|---|---|
| Base | 1 cup cooked quinoa |
| Protein | 1 cup diced chicken seasoned with spices |
| Vegetables | 1 cup mixed bell peppers and broccoli |
| Seasoning | 1 teaspoon Italian seasoning |
| Topping | 1/2 cup shredded mozzarella cheese |
By layering ingredients thoughtfully, cooks can create delicious, well-balanced meals in a fraction of the time. This method not only saves time but also maximizes flavor, making it a valuable technique for anyone using microwave baking pans.
Preparing Breakfast Items
Microwave baking pans offer a convenient way to prepare a variety of breakfast items quickly. These pans allow cooks to create delicious meals without the need for extensive preparation or cooking time. Here are some efficient breakfast options that can be made using microwave baking pans:
- Egg Casserole: This dish can be baked in individual portions or a larger pan. It allows for easy reheating, making it perfect for busy mornings.
- Egg Bites: Mini muffin pans work well for creating quick and easy egg bites. These protein-packed snacks can be customized with various ingredients, such as cheese, vegetables, or meats.
- Breakfast Sandwiches: Prepare these sandwiches ahead of time, freeze them, and reheat in the microwave for a satisfying meal on the go.
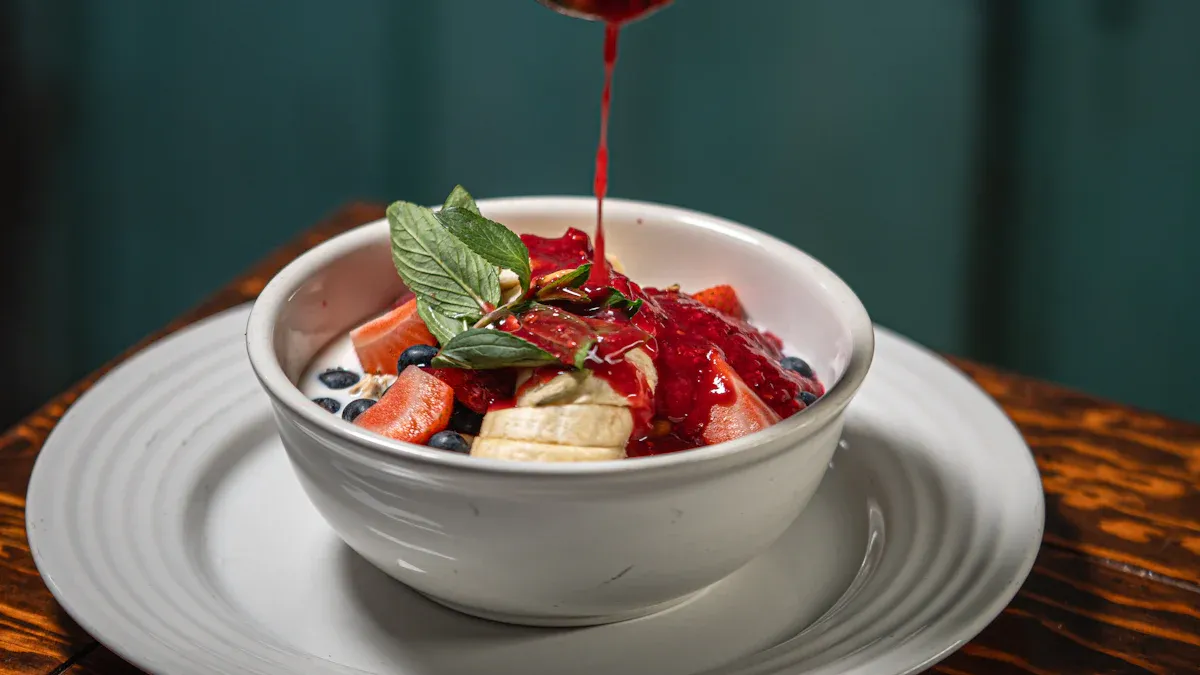
Another delightful breakfast item is the baked fruit parfait. This dish involves microwaving fruits with honey or syrup for about 1.25 minutes. The result is tender, flavorful fruit that pairs perfectly with Greek yogurt, creating a nutritious and delicious start to the day.
Tip: To enhance the flavor of egg dishes, consider adding herbs or spices before microwaving. This simple step can elevate the taste and make breakfast more enjoyable.
Using microwave baking pans not only saves time but also simplifies the cooking process. Cooks can experiment with different ingredients and flavors, tailoring each dish to their preferences. The versatility of these pans makes them an essential tool for anyone looking to streamline their breakfast routine.
By embracing the convenience of microwave baking pans, individuals can enjoy a variety of tasty breakfast options that fit into their busy lifestyles.
Microwave Omelets
Microwave omelets offer a quick and convenient breakfast option. They allow cooks to enjoy a nutritious meal without spending much time in the kitchen. Here’s how to prepare a delicious microwave omelet in just a few minutes.
Ingredients
To make a basic microwave omelet, gather the following ingredients:
| Ingredient | Amount |
|---|---|
| Eggs | 2 large |
| Milk | 2 tablespoons |
| Salt | 1 pinch |
| Pepper | 1 pinch |
| Cheese (optional) | 1/4 cup shredded |
| Vegetables (optional) | 1/4 cup diced |
Instructions
- Prepare the Mixture: In a microwave-safe bowl, whisk together the eggs, milk, salt, and pepper until well combined.
- Add Fillings: Stir in any desired cheese and vegetables. Popular choices include bell peppers, onions, and spinach.
- Microwave: Cover the bowl with a microwave-safe lid or plate. Microwave on high for 1 to 2 minutes. Check for doneness; the omelet should be set but still moist.
- Serve: Carefully remove the bowl from the microwave. Let it cool for a minute before serving. Enjoy your omelet straight from the bowl or slide it onto a plate.
Tip: For best results, avoid overcooking. Microwaves vary in power, so adjust cooking time as needed.
Microwave omelets are not only quick but also customizable. Cooks can experiment with different ingredients to suit their tastes. Adding herbs like chives or parsley can enhance flavor.
Pancakes in a Pan
Making pancakes in a microwave baking pan offers a quick and convenient way to enjoy this breakfast favorite. This method eliminates the need for flipping pancakes on a griddle, making it ideal for busy mornings. Here’s how to prepare fluffy pancakes in a microwave baking pan.
Ingredients
To create delicious pancakes, gather the following ingredients:
| Ingredient | Amount |
|---|---|
| All-purpose flour | 1 cup |
| Baking powder | 2 teaspoons |
| Sugar | 2 tablespoons |
| Salt | 1/4 teaspoon |
| Milk | 3/4 cup |
| Egg | 1 large |
| Melted butter | 2 tablespoons |
| Vanilla extract | 1 teaspoon |
Instructions
- Mix Dry Ingredients: In a microwave-safe bowl, combine the flour, baking powder, sugar, and salt. Stir until well mixed.
- Add Wet Ingredients: Pour in the milk, egg, melted butter, and vanilla extract. Mix until the batter is smooth.
- Prepare the Pan: Lightly grease the microwave baking pan with cooking spray or butter to prevent sticking.
- Pour the Batter: Pour the pancake batter into the pan, spreading it evenly.
- Microwave: Cook on high for 2-3 minutes. Check for doneness; the pancake should be set in the center.
- Serve: Allow the pancake to cool slightly before slicing. Serve with syrup, fruit, or your favorite toppings.
Tip: For added flavor, consider mixing in chocolate chips, blueberries, or nuts before microwaving. This customization enhances the pancake experience.
Using a microwave baking pan for pancakes not only saves time but also simplifies the cooking process. This method allows cooks to enjoy a delicious breakfast without the hassle of traditional cooking methods.
Embrace the convenience of pancakes in a pan and enjoy a delightful start to the day!
Cooking Snacks
Microwave baking pans serve as excellent tools for preparing quick and delicious snacks. These pans allow cooks to create a variety of treats without extensive preparation or cleanup. Here are some popular snack ideas that can be easily made using microwave baking pans:
- Cheesy Nachos: Layer tortilla chips with cheese and your favorite toppings. Microwave until the cheese melts, then serve with salsa or guacamole.
- Microwave Popcorn: Place popcorn kernels in a microwave-safe bowl, cover with a microwave-safe lid, and cook for 2-4 minutes. Enjoy fresh popcorn in minutes!
- Mini Pizzas: Use English muffins or pita bread as a base. Top with sauce, cheese, and toppings of choice. Microwave until the cheese bubbles.
- Chocolate-Covered Pretzels: Melt chocolate in a microwave baking pan. Dip pretzels into the chocolate, then let them cool on parchment paper.
- Fruit Crisp: Combine sliced fruit with a sprinkle of sugar and oats. Microwave until the fruit is tender and the topping is golden.
Tip: Always monitor cooking times closely. Microwaves vary in power, so adjust times as needed to prevent overcooking.
Using microwave baking pans for snacks not only saves time but also encourages creativity. Cooks can experiment with different ingredients and flavors. For example, adding spices or herbs can elevate simple snacks into gourmet treats.
Here’s a quick table summarizing snack ideas and their preparation times:
| Snack Idea | Prep Time | Cook Time | Total Time |
|---|---|---|---|
| Cheesy Nachos | 5 minutes | 2 minutes | 7 minutes |
| Microwave Popcorn | 2 minutes | 3 minutes | 5 minutes |
| Mini Pizzas | 5 minutes | 1 minute | 6 minutes |
| Chocolate-Covered Pretzels | 5 minutes | 1 minute | 6 minutes |
| Fruit Crisp | 5 minutes | 3 minutes | 8 minutes |
By utilizing microwave baking pans, cooks can enjoy a variety of tasty snacks in no time. This method not only enhances convenience but also makes snacking fun and creative!
Popcorn Perfection
Making popcorn in a microwave baking pan offers a quick and delightful snack option. This method allows for easy preparation and customization, ensuring a perfect pop every time. Here’s how to achieve popcorn perfection using a microwave baking pan:
-
Choose the Right Pan: Select a microwave-safe baking pan with a lid. A glass or silicone pan works well, as it allows for even heat distribution.
-
Add the Kernels: Pour about 1/4 cup of popcorn kernels into the pan. This amount typically yields a generous serving.
-
Seasoning Options: Before microwaving, consider adding seasonings. A drizzle of olive oil or melted butter enhances flavor. For a savory twist, sprinkle garlic powder, paprika, or nutritional yeast. For a sweet treat, add a touch of sugar or cinnamon.
-
Cover the Pan: Secure the lid on the baking pan. This step is crucial as it traps steam, allowing the kernels to pop effectively.
-
Microwave: Cook on high for 2-4 minutes. Listen for the popping to slow down. When there are 2-3 seconds between pops, stop the microwave to prevent burning.
-
Serve and Enjoy: Carefully remove the pan from the microwave. Let it cool for a moment before opening the lid. Serve the popcorn in a bowl and enjoy!
Tip: Experiment with different seasonings to find your favorite flavor combinations. Try adding grated cheese, chili powder, or even a sprinkle of sea salt for a gourmet touch.
Using a microwave baking pan for popcorn not only saves time but also minimizes cleanup. This method allows for creativity, making it easy to enjoy a personalized snack. With these simple steps, anyone can achieve popcorn perfection in minutes!
Nachos in a Flash
Microwave baking pans make preparing nachos a quick and enjoyable experience. This method allows cooks to create a delicious snack in just a few minutes. Here’s how to whip up nachos in a flash:
Ingredients
To make quick nachos, gather the following ingredients:
| Ingredient | Amount |
|---|---|
| Tortilla chips | 2 cups |
| Shredded cheese | 1 cup |
| Jalapeños (sliced) | 1/4 cup |
| Black olives (sliced) | 1/4 cup |
| Salsa | 1/2 cup |
| Sour cream (optional) | For serving |
Instructions
- Layer the Chips: Spread the tortilla chips evenly in a microwave-safe baking pan.
- Add Toppings: Sprinkle shredded cheese over the chips. Add jalapeños and black olives as desired.
- Microwave: Cover the pan with a microwave-safe lid or plate. Microwave on high for 1-2 minutes, or until the cheese melts.
- Serve: Remove the pan from the microwave. Drizzle salsa over the nachos and serve with sour cream on the side.
Tip: For added flavor, consider incorporating cooked ground beef or shredded chicken before microwaving. This addition transforms simple nachos into a hearty meal.
Using microwave baking pans for nachos not only saves time but also allows for creativity. Cooks can experiment with various toppings, such as guacamole, diced tomatoes, or fresh cilantro. The versatility of this dish makes it suitable for parties, game days, or a quick snack at home.
In just a few minutes, anyone can enjoy a plate of cheesy, flavorful nachos. This method proves that delicious snacks do not require extensive preparation or cooking time.
Embrace the convenience of microwave baking pans and enjoy nachos in a flash!
Crafting Homemade Gifts
Microwave baking pans provide an excellent opportunity for crafting homemade gifts. These gifts can be both thoughtful and practical, showcasing creativity while saving time. Here are some ideas for using microwave baking pans to create delightful presents:
-
Personalized Cookie Mix Jars: Layer dry ingredients for cookies in a jar. Include a tag with instructions for adding wet ingredients and baking time. This gift allows recipients to enjoy fresh cookies with minimal effort.
-
Homemade Candles: Melt wax in a microwave-safe baking pan. Pour the melted wax into decorative containers, adding scents and colors as desired. Once cooled, these candles make charming gifts for any occasion.
-
Customized Mug Cakes: Prepare dry ingredients for mug cakes in small containers. Attach a recipe card with instructions. Recipients can enjoy a quick dessert by simply adding water and microwaving.
-
DIY Bath Salts: Combine Epsom salt, sea salt, and essential oils in a microwave-safe pan. Heat the mixture briefly to blend the scents. Package the bath salts in jars for a relaxing gift.
Tip: When crafting gifts, consider personalizing them based on the recipient’s preferences. Tailoring gifts adds a special touch that shows thoughtfulness.
Using microwave baking pans simplifies the process of creating these gifts. They allow for easy mixing and melting, making the crafting experience enjoyable. Additionally, the quick preparation time means that even last-minute gifts can be made with ease.
Here’s a quick table summarizing some gift ideas and their preparation times:
| Gift Idea | Prep Time | Notes |
|---|---|---|
| Cookie Mix Jar | 10 minutes | Layer ingredients attractively |
| Homemade Candles | 15 minutes | Use various scents for customization |
| Customized Mug Cakes | 5 minutes | Include a fun recipe card |
| DIY Bath Salts | 10 minutes | Experiment with different essential oils |
Crafting homemade gifts using microwave baking pans not only saves time but also allows for creativity. These thoughtful presents can bring joy to friends and family, making any occasion special.
Baking Mixes
Microwave baking pans simplify the process of preparing baking mixes. Home cooks can create a variety of mixes that save time and enhance convenience. Here are some popular baking mixes that can be easily prepared using these versatile pans:
- Brownie Mix: Combine dry ingredients such as flour, cocoa powder, sugar, and baking powder. Package the mix in a jar with a label that includes instructions for adding wet ingredients and baking time.
- Pancake Mix: Mix flour, baking powder, sugar, and salt. This blend allows for quick pancake preparation. Just add milk and eggs before microwaving.
- Muffin Mix: Create a base mix with flour, sugar, baking powder, and spices. This mix can be customized with fruits or nuts before microwaving.
Using microwave baking pans for these mixes offers several advantages. First, they allow for even cooking, ensuring that baked goods rise uniformly. Second, they reduce cleanup time, as one pan can handle multiple tasks.
Tip: When preparing baking mixes, consider using airtight containers. This storage method keeps the mixes fresh and ready for use.
Here’s a quick table summarizing some baking mixes and their preparation times:
| Baking Mix | Prep Time | Cook Time | Total Time |
|---|---|---|---|
| Brownie Mix | 10 minutes | 5 minutes | 15 minutes |
| Pancake Mix | 5 minutes | 2 minutes | 7 minutes |
| Muffin Mix | 10 minutes | 3 minutes | 13 minutes |
By utilizing microwave baking pans, cooks can enjoy the benefits of quick and easy baking mixes. These mixes not only save time but also allow for creativity in the kitchen. Experimenting with different flavors and ingredients can lead to delightful results.
Personalized Treats
Microwave baking pans offer an excellent opportunity to create personalized treats that cater to individual tastes. These treats can serve as thoughtful gifts or delightful snacks for family and friends. Here are some creative ideas for making personalized treats using microwave baking pans:
-
Custom Mug Cakes: Prepare individual mug cakes tailored to each person’s preferences. Use different flavors, such as chocolate, vanilla, or red velvet. Add unique toppings like sprinkles, nuts, or fruit to enhance the experience.
-
Personalized Brownie Bites: Bake brownie bites in a microwave-safe pan. After baking, allow individuals to decorate their brownies with frosting, chocolate chips, or caramel drizzle. This interactive approach makes dessert time fun.
-
Customized Granola Bars: Mix oats, honey, and various add-ins like dried fruits, nuts, or chocolate chips. Press the mixture into a microwave baking pan and microwave until set. Cut into bars and package them with personalized labels.
-
Individual Fruit Crisps: Layer sliced fruits with a crumb topping in small microwave-safe dishes. Each person can choose their favorite fruit, such as apples, berries, or peaches. Microwave until bubbly and serve warm.
Tip: When creating personalized treats, consider dietary restrictions. Offering gluten-free or vegan options ensures everyone can enjoy the treats.
Using microwave baking pans simplifies the process of making these personalized treats. The quick cooking times allow for easy experimentation with flavors and ingredients. Additionally, the minimal cleanup makes it convenient for busy cooks.
Here’s a quick table summarizing some personalized treat ideas and their preparation times:
| Treat Idea | Prep Time | Cook Time | Total Time |
|---|---|---|---|
| Custom Mug Cakes | 5 minutes | 1 minute | 6 minutes |
| Personalized Brownie Bites | 10 minutes | 2 minutes | 12 minutes |
| Customized Granola Bars | 10 minutes | 3 minutes | 13 minutes |
| Individual Fruit Crisps | 5 minutes | 2 minutes | 7 minutes |
By embracing the versatility of microwave baking pans, cooks can create delicious, personalized treats that bring joy to any occasion.
Using a Microwave Grill Pan
A microwave grill pan offers a unique way to achieve grilled flavors without the need for an outdoor grill. This versatile kitchen tool allows cooks to prepare a variety of dishes quickly and efficiently. Here are some key benefits and uses of a microwave grill pan:
- Quick Cooking: The microwave grill pan cooks food faster than traditional grilling methods. It uses microwave energy to heat food while providing a grilled texture and flavor.
- Healthier Options: Grilling often requires less oil than frying. Using a microwave grill pan allows cooks to prepare healthier meals without sacrificing taste.
- Versatile Cooking: This pan can handle various foods, including meats, vegetables, and even sandwiches. Cooks can experiment with different ingredients to create delicious meals.
To use a microwave grill pan effectively, follow these simple steps:
- Preheat the Pan: Place the grill pan in the microwave for a minute or two to preheat. This step helps achieve that desirable grilled effect.
- Prepare the Food: Season the food as desired. For meats, marinating can enhance flavor. For vegetables, a sprinkle of olive oil and spices can elevate taste.
- Cook: Place the food on the grill pan and cover it with a microwave-safe lid. Cook according to the recipe or until the food reaches the desired doneness.
- Check for Doneness: Use a food thermometer to ensure meats reach safe internal temperatures. For vegetables, check for tenderness.
Using a microwave grill pan not only saves time but also simplifies the cooking process. Cooks can enjoy grilled meals without the hassle of outdoor grilling. This tool is perfect for busy individuals seeking quick, flavorful options.
Cooking Bacon Efficiently
Cooking bacon in a microwave baking pan offers a quick and mess-free method to enjoy this popular breakfast item. This technique not only saves time but also reduces cleanup. Here’s how to achieve perfectly cooked bacon using a microwave baking pan:
-
Choose the Right Pan: Select a microwave-safe baking pan with a lid. A flat, shallow pan works best for even cooking.
-
Prepare the Bacon: Lay the bacon strips in a single layer on the pan. Ensure the strips do not overlap, as this promotes even cooking.
-
Cover the Bacon: Place a microwave-safe paper towel over the bacon. This step absorbs excess grease and prevents splatters inside the microwave.
-
Microwave: Cook the bacon on high for 4 to 6 minutes. Cooking time may vary based on the microwave’s wattage and the thickness of the bacon. Check for doneness and adjust the time as needed.
-
Drain Excess Grease: Once cooked, carefully remove the bacon from the pan. Place it on a plate lined with paper towels to absorb any remaining grease.
Tip: For extra flavor, consider seasoning the bacon with black pepper or a sprinkle of brown sugar before microwaving. This addition enhances the taste and adds a touch of sweetness.
Using a microwave baking pan for bacon not only streamlines the cooking process but also minimizes the mess typically associated with frying. The result is crispy, delicious bacon ready to complement any breakfast or snack.
Here’s a quick table summarizing the cooking process:
| Step | Action |
|---|---|
| 1. Choose the Pan | Use a microwave-safe baking pan |
| 2. Prepare the Bacon | Lay strips in a single layer |
| 3. Cover the Bacon | Use a paper towel to absorb grease |
| 4. Microwave | Cook on high for 4 to 6 minutes |
| 5. Drain Excess Grease | Place on paper towels after cooking |
By following these steps, anyone can enjoy perfectly cooked bacon in a fraction of the time.
Tempering Chocolate
Tempering chocolate is a crucial technique that ensures a smooth, glossy finish and a satisfying snap when it cools. Using a microwave baking pan simplifies this process, making it accessible for both novice and experienced cooks. Here’s how to temper chocolate effectively:
-
Chop the Chocolate: Start by chopping high-quality chocolate into small, uniform pieces. This step promotes even melting.
-
Melt in the Microwave: Place the chopped chocolate in a microwave-safe baking pan. Heat it in the microwave at medium power for 30 seconds. Stir the chocolate after each interval to prevent overheating.
-
Monitor Temperature: Use a thermometer to check the chocolate’s temperature. For dark chocolate, aim for 88°F to 90°F (31°C to 32°C). For milk and white chocolate, target 86°F to 88°F (30°C to 31°C).
-
Cool Down: Once the chocolate reaches the desired temperature, remove it from the microwave. Stir in a small amount of unmelted chocolate to help cool it down. This technique, known as “seeding,” encourages the formation of stable cocoa butter crystals.
-
Reheat if Necessary: If the chocolate cools too much, return it to the microwave for short bursts of 10 seconds, stirring in between.
Tip: Avoid overheating the chocolate. Overheating can cause it to seize, ruining the tempering process.
Tempered chocolate is perfect for coating candies, making chocolate decorations, or dipping fruits. The glossy finish and firm texture enhance the visual appeal and taste of any dessert.
By mastering the art of tempering chocolate using a microwave baking pan, cooks can elevate their confectionery skills and impress friends and family with beautifully crafted treats. 🍫
Blanching Garlic
Blanching garlic enhances its flavor and texture while reducing bitterness. This technique involves briefly cooking garlic in boiling water, followed by rapid cooling in ice water. Here’s how to effectively blanch garlic using a microwave baking pan:
-
Prepare the Garlic: Start by peeling the garlic cloves. Use as many cloves as needed for your recipe.
-
Boil Water: Fill a microwave-safe bowl with water. Heat it in the microwave until it reaches a rolling boil. This usually takes about 3-5 minutes, depending on the microwave’s wattage.
-
Blanch the Garlic: Carefully add the peeled garlic cloves to the boiling water. Microwave for 30 seconds to 1 minute. The goal is to soften the garlic without cooking it completely.
-
Cool the Garlic: Immediately transfer the garlic cloves to a bowl of ice water. This step stops the cooking process and helps maintain the garlic’s vibrant color.
-
Drain and Use: Once cooled, drain the garlic and pat it dry. The blanched garlic is now ready to use in various dishes.
Tip: Blanching garlic not only mellows its flavor but also makes it easier to digest. This technique is especially useful for recipes that require raw garlic, as it reduces pungency while retaining essential flavors.
Blanching garlic can enhance sauces, dressings, and marinades. It allows cooks to enjoy the benefits of garlic without overwhelming dishes with its strong taste. By mastering this simple technique, anyone can elevate their culinary creations with ease.
Dehydrating Herbs
Dehydrating herbs using microwave baking pans offers a quick and efficient method to preserve flavors. This technique allows cooks to enjoy fresh herbs long after the growing season ends. Here’s how to effectively dehydrate herbs in a microwave:
-
Select Fresh Herbs: Choose herbs that are vibrant and free from blemishes. Popular options include basil, parsley, thyme, and oregano.
-
Wash and Dry: Rinse the herbs under cold water to remove dirt. Pat them dry with a clean towel to eliminate excess moisture.
-
Prepare the Microwave Baking Pan: Spread the herbs in a single layer on the microwave baking pan. Avoid overcrowding, as this ensures even drying.
-
Cover the Herbs: Place a microwave-safe paper towel over the herbs. This step helps absorb moisture during the drying process.
-
Microwave: Heat the herbs on high for 30 seconds. Check for doneness and continue microwaving in 15-second intervals until the herbs are dry and crumbly. The total time may vary based on the herb type and microwave wattage.
Tip: Monitor the herbs closely to prevent burning. Overheating can lead to a loss of flavor and aroma.
- Cool and Store: Allow the dehydrated herbs to cool completely before transferring them to an airtight container. Store them in a cool, dark place to maintain freshness.
Using this method, cooks can create their own dried herb blends. They can mix different herbs for unique flavors. For example, combining basil and oregano creates a delightful Italian seasoning.
Here’s a quick table summarizing the steps for dehydrating herbs:
| Step | Action |
|---|---|
| 1. Select Fresh Herbs | Choose vibrant, blemish-free herbs |
| 2. Wash and Dry | Rinse and pat dry |
| 3. Prepare the Pan | Spread herbs in a single layer |
| 4. Cover the Herbs | Use a paper towel to absorb moisture |
| 5. Microwave | Heat in intervals until dry |
| 6. Cool and Store | Transfer to an airtight container |
Dehydrating herbs in a microwave baking pan not only saves time but also enhances culinary creativity. This method allows cooks to enjoy the rich flavors of herbs year-round.
Testing Meat Blends
Testing meat blends in microwave baking pans allows cooks to experiment with flavors and textures efficiently. This method is particularly useful for creating custom meat mixtures for burgers, meatballs, or meatloaf. Here are some effective steps to test meat blends using microwave baking pans:
-
Choose Your Meats: Select a combination of meats, such as beef, pork, turkey, or chicken. Each meat brings unique flavors and textures to the blend.
-
Prepare the Blend: In a mixing bowl, combine the chosen meats. Use a ratio that suits personal taste preferences. A common starting point is a 50/50 blend of two different meats.
-
Add Seasonings: Incorporate spices, herbs, and other flavorings. Common additions include garlic powder, onion powder, salt, pepper, and fresh herbs. Adjust the seasonings based on the intended dish.
-
Form Test Patties: Shape small patties or balls from the meat mixture. This step allows for easy cooking and testing of the blend.
-
Microwave Cooking: Place the patties in a microwave-safe baking pan. Cover the pan with a microwave-safe lid or plate to retain moisture. Cook on high for 3-5 minutes, checking for doneness. The internal temperature should reach at least 165°F (74°C).
-
Taste Test: Once cooked, allow the patties to cool slightly. Taste a small piece to evaluate the flavor and texture. Adjust the seasoning or meat ratio as needed for future blends.
Tip: Keep notes on the ratios and seasonings used. This practice helps refine the blend for future recipes.
Using microwave baking pans for testing meat blends not only saves time but also simplifies the cooking process. Cooks can enjoy the benefits of quick experimentation, leading to delicious and personalized meat dishes.
Softening Ingredients
Microwave baking pans provide an efficient method for softening various ingredients, making meal preparation quicker and easier. This technique is particularly useful for items like butter, cream cheese, and even fruits. Here are some effective ways to soften ingredients using microwave baking pans:
-
Butter: To soften butter quickly, cut it into small cubes and place them in a microwave-safe baking pan. Microwave on low power for 10-15 seconds. Check the butter frequently to avoid melting. Softened butter is perfect for baking and spreading.
-
Cream Cheese: For recipes requiring softened cream cheese, cut it into smaller pieces and arrange them in a microwave baking pan. Heat on medium power for 15-20 seconds. Stir the cream cheese to ensure even softening. This method helps achieve a smooth texture for dips and spreads.
-
Fruits: Softening fruits like bananas or peaches can enhance their flavor and texture. Place the fruit in a microwave-safe baking pan and cover it with a microwave-safe lid. Heat for 30 seconds to 1 minute, depending on the fruit’s ripeness. This technique works well for making smoothies or sauces.
Tip: Always monitor the cooking time closely. Overheating can lead to unwanted melting or cooking, which may alter the ingredient’s intended use.
Using microwave baking pans for softening ingredients not only saves time but also simplifies the cooking process. This method allows cooks to prepare ingredients quickly, ensuring they are ready for use in various recipes. Embracing this technique can enhance efficiency in the kitchen, making meal preparation more enjoyable.
Microwave baking pans offer numerous benefits, including time savings and versatility in cooking. They allow cooks to prepare a wide range of dishes quickly, from desserts to healthy meals. Readers should explore these creative methods to enhance their culinary skills. Using a microwave grill pan can further elevate the cooking experience, making it both efficient and enjoyable. Embrace the fun of experimenting with different recipes and techniques, and discover how these pans can transform everyday cooking into a delightful adventure.
FAQ
What types of microwave baking pans are available?
Microwave baking pans come in various materials, including glass, silicone, and ceramic. Each type offers unique benefits, such as heat retention or non-stick properties, making them suitable for different cooking tasks.
Can I use metal pans in the microwave?
No, metal pans should not be used in the microwave. Metal can cause sparks and damage the microwave. Always opt for microwave-safe materials like glass, silicone, or ceramic.
How do I clean microwave baking pans?
To clean microwave baking pans, use warm soapy water and a soft sponge. Avoid abrasive cleaners that can scratch the surface. For stubborn stains, soak the pan in a mixture of baking soda and water.
Are microwave baking pans safe for high temperatures?
Yes, most microwave baking pans are designed to withstand high temperatures. However, always check the manufacturer’s guidelines to ensure safe usage and avoid overheating.
Can I bake bread in a microwave baking pan?
Yes, you can bake bread in a microwave baking pan. Use specific microwave bread recipes for best results, as cooking times and techniques differ from traditional baking.