
Get ready to make delicious hot sandwiches in your microwave. Many homes already have a microwave, with over 90% of U.S. households owning one by 1997. Countries like Finland and Spain also show over 90% ownership in 2024. This guide provides clear microwave sandwich maker instructions. You will learn how to use microwave sandwich maker effectively. This comprehensive microwave sandwich maker for beginners guide covers everything. It includes understanding the ideal microwave sandwich maker cooking time. Soon, you will master your new microwave sandwich maker.
Key Takeaways
- A microwave sandwich maker helps you make hot sandwiches quickly and easily. It uses heat and moisture to cook your sandwich.
- Always check if your sandwich maker is microwave-safe. Use oven mitts to remove it because it gets very hot.
- Butter the outside of your bread for a crispy sandwich. Do not overfill the maker to ensure even cooking.
- Cook your sandwich for 3 to 5 minutes. Flip it halfway through for even toasting. Adjust time based on your microwave.
- Clean your sandwich maker right after use. This keeps it ready for your next delicious meal.
Getting to Know Your Microwave Sandwich Maker

What a Microwave Sandwich Maker Is
A microwave sandwich maker is a clever kitchen tool. It helps people create delicious hot sandwiches fast. This gadget typically features two hinged parts. These parts clamp together around your sandwich. It holds all the ingredients securely inside. The maker cooks the sandwich evenly. It also helps toast the bread. This gives the sandwich a satisfying texture. Think of it as a mini grill for your microwave. It transforms cold ingredients into a warm, comforting meal in minutes.
How Your Microwave Sandwich Maker Works
This device operates by trapping heat and moisture. When you put your sandwich inside and microwave it, the maker forms a contained cooking space. The materials of the maker absorb some microwave energy. This energy helps to toast the bread. It also melts the cheese and warms the fillings. Many designs include small vents. These vents allow steam to escape. This prevents the sandwich from getting soggy. It ensures a pleasant, crispy result. The internal design often includes ridges. These ridges help to press the sandwich. They also create those appealing grill marks.
Types of Microwave Sandwich Makers
Consumers can find various types of these convenient kitchen tools. Some models are made from durable, heat-resistant plastic. These are often lightweight and affordable. Others use flexible silicone or sturdy ceramic materials. Silicone makers are easy to store. Ceramic options often provide more even heating. They come in different shapes and sizes. Some makers are designed for a single sandwich. Other versions can prepare two sandwiches simultaneously. Certain models feature non-stick surfaces. These surfaces make cleanup simple. People can select a maker that best suits their kitchen and preferences. For example, a busy student might prefer a compact plastic model. A family might choose a larger ceramic one.
Safety Tips for Your Microwave Sandwich Maker
Safety always comes first when using any kitchen appliance. Your microwave sandwich maker is no exception. Following a few simple guidelines ensures a safe and enjoyable cooking experience.
First, always check the product’s label. Manufacturers design these makers specifically for microwave use. They will clearly state if the material is microwave-safe. Never put anything in your microwave that does not have this label. Using non-microwave-safe items can cause damage to your appliance or even start a fire.
Next, avoid overheating. Each sandwich maker has recommended cooking times. Sticking to these times prevents the device from getting too hot. Overheating can warp the plastic or silicone. It might also make your sandwich unpleasantly hard or burnt. Experimenting with times is fine, but always start with the lower end of the suggested range.
Tip: If you are unsure about cooking times, begin with 30-60 seconds. Then, add 15-second intervals until your sandwich reaches perfection.
Remember, the microwave sandwich maker will be hot after cooking. Always use oven mitts or a kitchen towel when you remove it from the microwave. This protects your hands from burns. Open the maker carefully, as steam can escape and cause scalding.
Finally, inspect your maker regularly. Look for any cracks, melting, or signs of wear. If you notice any damage, it is best to replace the device. A damaged maker might not perform correctly and could pose a safety risk. Keeping it clean also helps maintain its integrity and prevents food buildup from causing issues.
Gathering Ingredients for Your Microwave Sandwich Maker
Making a great sandwich starts with choosing the right ingredients. You want fresh items that will taste delicious when warm. Think about your favorite hot sandwiches. Then, gather those components.
Essential Sandwich Ingredients
You need a few basic items for any hot sandwich. Cheese is often a must-have. It melts nicely and adds a creamy texture. Sliced deli meats like ham, turkey, or roast beef work well. They heat up quickly. You can also use cooked bacon or pre-cooked chicken slices. Vegetables like spinach, sliced tomatoes, or onions add freshness. Make sure to slice them thinly. This helps them cook evenly.
Best Bread for Your Microwave Sandwich Maker
The type of bread you choose matters. Regular sliced sandwich bread is usually best. White or wheat bread works perfectly. They are soft enough to press down. They also toast slightly in the microwave sandwich maker. Avoid very thick or crusty breads. They might not fit well. They also might not heat through properly. Thin bagels or English muffins can also be good choices. They offer a different texture.
Optional Additions for Flavor
You can elevate your sandwich with extra flavors. Condiments like mustard, mayonnaise, or a touch of hot sauce add zest. Spices such as garlic powder or dried herbs can boost taste. Consider adding a slice of pickle for a tangy crunch. A sprinkle of red pepper flakes gives a little heat. Experiment with different combinations. You will find your perfect hot sandwich.
Tools You’ll Need
Making a hot sandwich with your new gadget requires only a few basic kitchen tools. You probably already own most of these items. They help you prepare your ingredients and safely handle your delicious creation.
First, you need a cutting board and a sharp knife. These are essential for slicing bread, cheese, or any other fillings. Thin, even slices cook best in the microwave. A good knife makes this task much easier.
Next, you will need a spatula or tongs. These tools help you remove the hot sandwich from the microwave sandwich maker. They protect your hands from the heat. They also keep the sandwich intact as you transfer it to a plate.
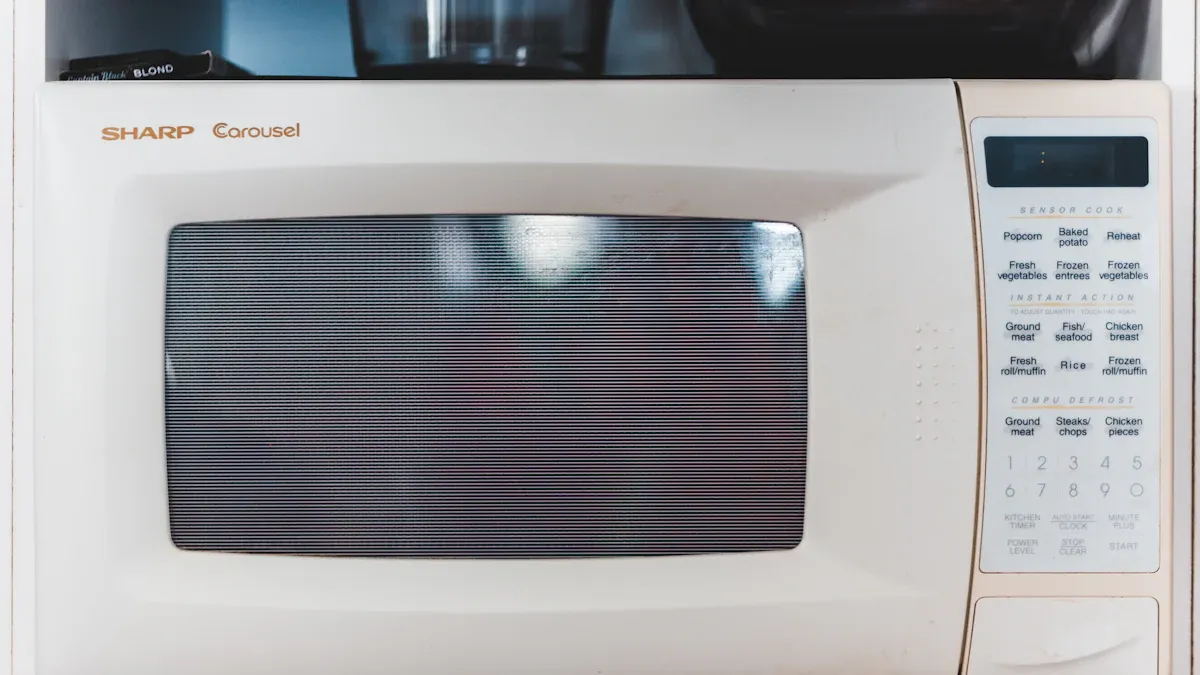
Of course, you need a microwave oven. This is where all the magic happens. Ensure your microwave is clean and in good working order. A clean microwave helps food cook more efficiently.
You will also want a plate for serving your finished sandwich. A sturdy plate holds the hot sandwich well. It also catches any melted cheese or crumbs.
Consider having oven mitts or a thick kitchen towel nearby. The microwave sandwich maker gets very hot during cooking. You should always use protection when you take it out of the microwave. This prevents burns.
Tip: Keep a small bowl or a piece of parchment paper handy. You can use it to catch any drips or crumbs during assembly. This keeps your counter clean.
Finally, you need your microwave sandwich maker itself. This is the star of the show. Make sure it is clean and ready for use before you start. Having all your tools ready before you begin makes the cooking process smooth and enjoyable.
Step-by-Step Guide to Using Your Microwave Sandwich Maker
Making a delicious hot sandwich with your new gadget is simple. Just follow these steps. You will enjoy a warm, satisfying meal in minutes.
Prepare Your Bread and Fillings
First, gather all your ingredients. Make sure everything is ready before you start assembling. Slice any cheese or vegetables you plan to use. Thin slices work best. They cook evenly. If you use meats like bacon, ensure they are already cooked. Raw meats will not cook properly in the short microwave time. Lay out your bread slices. This helps you visualize your sandwich.
Buttering the Bread for Your Microwave Sandwich Maker
Buttering the bread is a crucial step. It helps achieve that perfect crispness. You should spread butter on the outside of the sandwich. This creates a golden, slightly toasted texture. It also adds a rich flavor. Use a thin, even layer of butter. Too much butter can make the sandwich greasy. If you prefer, you can use mayonnaise or a light oil spray instead of butter. These options also help with browning.
Assemble the Sandwich in the Microwave Sandwich Maker
Now, it is time to build your masterpiece. Place one slice of buttered bread, butter-side down, into the bottom half of your microwave sandwich maker. Next, add your fillings. Start with a slice of cheese. Then, layer your meats or vegetables. Finish with another slice of cheese. This helps hold everything together. Finally, place the second slice of buttered bread on top, butter-side up. Do not overfill the sandwich. Too many ingredients can prevent the maker from closing properly. It can also lead to uneven cooking.
Secure the Microwave Sandwich Maker
After assembling the sandwich, close the microwave sandwich maker. Most models have latches or clips on the sides. These features hold the two halves together. Make sure the maker closes completely. You should feel a slight resistance as the bread and fillings compress. If the maker does not close easily, you probably overfilled the sandwich. Remove some ingredients and try again. A properly secured maker ensures even cooking and prevents ingredients from spilling out during microwaving.
Microwave Your Sandwich for the Right Time
Now, place the secured microwave sandwich maker into your microwave oven. Cooking times vary based on your microwave’s wattage and the sandwich’s thickness. A standard sandwich in a microwave sandwich maker typically takes 3 to 5 minutes to cook. Many people find success with a specific method. They cook the sandwich for 2 to 3 minutes first. Then, they flip the unit over and cook it for an additional 1 to 2 minutes. This totals 3 to 5 minutes. This flipping helps ensure both sides of the bread toast evenly. Always start with the lower end of the time range. You can always add more time if needed. Overcooking can make the bread hard or rubbery.
Carefully Remove and Check Your Sandwich
When the microwave finishes, the microwave sandwich maker will be very hot. Use oven mitts or a thick kitchen towel to remove it from the microwave. Place it on a heat-safe surface. Carefully unlatch the clips or open the maker. Be cautious, as steam will escape. This steam can cause burns. Check your sandwich. The cheese should be melted and bubbly. The bread should look lightly toasted and feel warm. If the sandwich needs more cooking, close the maker and microwave it for another 15 to 30 seconds. Repeat this process until the sandwich reaches your desired perfection.
Serve and Enjoy Your Creation
The moment has arrived! Your delicious hot sandwich is ready. Carefully remove the microwave sandwich maker from the microwave. Remember, it will be very hot. Always use oven mitts or a thick kitchen towel for protection. Place the hot maker on a heat-safe surface, like a trivet or a cutting board.
Now, unlatch the clips or open the maker. Be cautious as you do this. A burst of hot steam will escape. This steam can cause burns if it hits bare skin. Use a spatula or tongs to gently lift the sandwich out of the maker. Transfer it directly onto a plate. The sandwich will be warm and inviting.
Serve the sandwich immediately. Hot sandwiches taste best right after cooking. The cheese will be perfectly melted and gooey. The bread will have a pleasant, slightly toasted texture. You can enjoy your creation as is. Many people like to add a side. A small salad or some potato chips make great companions.
Consider adding extra condiments if you wish. A dollop of ketchup, a swirl of hot sauce, or a spread of mustard can enhance the flavor. Some people enjoy dipping their hot sandwich into a bowl of tomato soup. This creates a comforting meal.
💡 Tip: Let the sandwich cool for just a minute or two before taking the first bite. This prevents burning your mouth on the hot cheese or fillings. It also allows the flavors to meld together even more.
You have successfully made a hot sandwich using your microwave sandwich maker! 🎉 This simple process allows for quick and easy meals. You can now enjoy the fruits of your labor.
Tips for Perfect Microwave Sandwiches Every Time
Don’t Overfill Your Microwave Sandwich Maker
You might think more filling makes a better sandwich. However, this is not true for this kitchen tool. Overfilling causes problems. The maker might not close properly. This means the sandwich will not cook evenly. Ingredients can also spill out. This creates a mess. Aim for a balanced amount of filling. A good rule is to keep the sandwich about as thick as two slices of bread. This allows the maker to press the sandwich. It also helps everything cook through.
Experiment with Microwave Times
Every microwave is different. Your microwave’s power level affects cooking times. The thickness of your sandwich also plays a role. Therefore, you should experiment with cooking times. Start with a shorter time, like 2 to 3 minutes. Then, check the sandwich. If it needs more cooking, add 15 to 30 seconds. Repeat this until the cheese melts and the bread feels warm. Flipping the unit halfway through helps both sides toast. This method prevents overcooking. It also ensures a perfectly heated sandwich.
Tip: Keep a small notebook near your microwave. Write down the perfect cooking time for your favorite sandwich combinations. This saves time later!
Best Cheeses for Melting in Your Microwave Sandwich Maker
Gooey, melted cheese makes a hot sandwich special. Some cheeses melt better than others. American cheese is a top choice. It melts smoothly and quickly. Cheddar cheese also works well. Choose a mild or medium cheddar for the best melt. Mozzarella offers a nice stretch and mild flavor. Provolone cheese melts beautifully too. These cheeses have good moisture and fat content. This helps them become soft and creamy when heated. Avoid hard cheeses like Parmesan. They do not melt well in the microwave. Crumbly cheeses like feta also do not create that desired gooey texture. Stick to the softer, meltier varieties for the best results in your microwave sandwich maker.
Preventing Soggy Bread in Your Microwave Sandwich Maker
Nobody wants a soggy sandwich. You want that satisfying crunch or soft, warm texture. Several simple tricks help you avoid wet bread when using your microwave sandwich maker.
First, consider wrapping your sandwich in a paper towel before you place it in the microwave sandwich maker. This simple step works wonders. The paper towel absorbs excess moisture released during cooking. This reduces sogginess significantly. It can also help shorten the cooking time needed for the bread to achieve a pleasant texture.
Another effective method involves a slight change in your cooking process. Instead of microwaving a fully assembled sandwich, you can melt the cheese first. Place your cheese and fillings in the microwave for a short burst until the cheese melts. Then, toast your bread separately. You can use a toaster or a pan for this. This approach helps dry out any moisture the microwave introduces. It also allows the bread to absorb butter better. You get a crispier result this way.
💡 Tip: Always use fresh bread. Stale bread tends to absorb moisture more readily, leading to a quicker path to sogginess.
Creative Filling Ideas for Your Microwave Sandwich Maker
Your microwave sandwich maker opens up a world of culinary possibilities beyond a simple grilled cheese. You can experiment with many different fillings. Get creative and try new combinations.
Here are some exciting ideas to inspire your next hot sandwich creation:
-
Vegan Delights:
- Tempeh BLT: Use tempeh bacon for a smoky, savory flavor. Add lettuce and tomato for freshness.
- Roasted Veggie Sandwich: Combine roasted zucchini, sweet potato, and beets. Spread hummus or ricotta cheese for extra creaminess.
- Mushroom Melt: Sauté mushrooms with plant-based protein. Add your favorite vegan cheese for a hearty option.
-
Classic Comforts with a Twist:
- Grilled Cheese: A timeless favorite. Try different cheeses like cheddar, mozzarella, or provolone.
- Tuna Salad Sandwich: Warm tuna salad in your maker for a comforting meal.
- French Dip Tortilla Rollups: Use roast beef and a side of au jus for dipping.
-
Breakfast Boosters:
- Shirred Eggs: Place deli ham and cooked winter squash with an egg. Cook until the egg sets.
- Scrambled Eggs/Omelets: Mix scrambled eggs with various meat or vegetable fillings. Add cheese for a quick breakfast sandwich.
-
International Flavors:
- Thai Veggie Wraps: Fill with crunchy vegetables and a peanut sauce.
- Greek Chicken Wrap: Use cooked chicken, feta cheese, olives, and a touch of tzatziki.
- Quesadillas: Use any leftover vegetables and meats. Add canned beans, onions, and salsa for a quick and easy meal.
Do not be afraid to use leftovers. Cooked chicken, ham, or even roasted vegetables can become delicious sandwich fillings. Think about what you have in your fridge. You might discover your new favorite hot sandwich!
Troubleshooting Common Microwave Sandwich Maker Issues
Sometimes, things do not go perfectly. You might face a few common problems with your microwave sandwich maker. Do not worry! These issues are usually easy to fix.
Why Your Sandwich Might Be Soggy
A soggy sandwich is disappointing. Several things can cause this. First, too much moisture in your fillings makes the bread wet. Think about juicy tomatoes or wet spinach. Second, steam gets trapped inside the maker. This steam condenses on the bread. You can try a simple trick. Wrap your sandwich in a paper towel before putting it in the maker. The paper towel absorbs extra moisture. Also, make sure you do not overcook the sandwich. Overcooking can release more moisture from the fillings.
Why Your Cheese Isn’t Melting
You want gooey, melted cheese. If your cheese stays solid, check a few things. You might use the wrong kind of cheese. Hard cheeses like Parmesan do not melt well in the microwave. They need more direct heat. Stick to soft, high-moisture cheeses. American, cheddar, mozzarella, or provolone work best. Also, your cooking time might be too short. Give the sandwich a little more time. Add 15 to 30 seconds. This extra time often helps the cheese get perfectly bubbly.
Dealing with Uneven Cooking
Uneven cooking can be frustrating. One side might be hot, the other cold. Or, one part of the bread might be toasted, another soft. You can take steps to fix this. First, avoid overfilling your maker. Filling compartments only about two-thirds full helps heat spread evenly. This also ensures the lid closes properly. Second, grease the cooking surfaces. This prevents sticking. It also helps with better browning. Finally, try flipping the sandwich maker halfway through the cooking time. This helps both sides of the sandwich get equal heat.
Preventing Sticking in Your Microwave Sandwich Maker
Nobody enjoys a sandwich stuck to their maker. It makes a mess and ruins the perfect meal. Fortunately, you can easily prevent sticking. A few simple steps ensure your sandwich releases cleanly every time.
First, always prepare the bread properly. Buttering the outside of your bread slices helps a lot. The butter creates a barrier between the bread and the maker’s surface. This barrier prevents sticking. If you prefer not to use butter, a light coating of mayonnaise works just as well. Some people also use a small amount of cooking oil. You can brush it onto the bread.
Second, consider using a non-stick cooking spray. Before you place the bread in the maker, give the inside surfaces a quick spray. This adds an extra layer of protection. It works especially well for makers without a natural non-stick coating. Make sure the spray you use is microwave-safe. Most common cooking sprays are safe for microwave use.
💡 Tip: Do not overdo the spray or butter. Too much can make your sandwich greasy. A thin, even layer is all you need for effective non-stick action.
Third, ensure your microwave sandwich maker is clean. Food residue from previous uses can cause new sandwiches to stick. Always clean the maker thoroughly after each use. This removes any baked-on bits. A clean surface is a non-stick surface.
Finally, avoid forcing the maker closed. If you overfill your sandwich, the maker might struggle to close. This can put pressure on the bread. It might also cause ingredients to squeeze out and stick to the sides. A properly filled sandwich closes easily. This allows for even cooking and easy removal. By following these tips, you will enjoy perfectly released sandwiches every time. No more frustrating sticky situations!
Beyond Basic Sandwiches with Your Microwave Sandwich Maker
Your microwave sandwich maker is not just for simple grilled cheese. It can create many different meals. People can explore new flavors and ideas. This little gadget helps make breakfast, lunch, and even dessert.
Breakfast Sandwich Ideas
The microwave sandwich maker is perfect for a quick morning meal. It makes warm and satisfying breakfast sandwiches. People can easily make an egg and avocado sandwich. They start by toasting a bagel thin. Then, they cook egg whites or a whisked egg in a microwave-safe bowl. This takes about 1 minute 30 seconds. They add salt, pepper, and spinach to the egg. After cooking, they spread cheese on the warm bagel. Laughing Cow herb and garlic cheese works well. Then, they add the cooked egg. Slices of avocado and tomato go on top. People can also add grated Parmesan cheese to the eggs. Goat cheese or cambazola cheese can go on the bagel. Red bell pepper, mushrooms, or diced onion mix well with the eggs. A dash of hot sauce finishes it off.
Dessert Sandwich Creations
Who says sandwiches are only for savory meals? Your microwave sandwich maker can make sweet treats too. People can try a banana and Nutella sandwich. Spread Nutella on bread. Add sliced bananas. Microwave it until warm and gooey. Another idea is an apple and cinnamon sandwich. Thinly slice apples. Sprinkle them with cinnamon and a little sugar. Place them between bread slices. A small piece of chocolate inside also melts nicely.
Quick Lunch Options
This gadget is a lifesaver for fast lunches. People can use leftovers to create new meals. Cooked chicken or ham works well. Add some cheese and a favorite sauce. A mini pizza sandwich is also easy. Use bread as the crust. Add tomato sauce, cheese, and pepperoni. Microwave it until the cheese melts. Quesadillas are another simple choice. Put cheese and cooked beans between tortillas. Microwave until warm and bubbly.
Vegetarian and Vegan Variations
People who follow vegetarian or vegan diets can also enjoy delicious hot sandwiches from their microwave maker. This handy gadget makes it easy to create plant-based meals. You can explore many tasty options.
For a delightful vegetarian choice, consider an Open Grilled Veggie Sandwich. This recipe uses fresh vegetables and cheese. First, people cut bell peppers and chop onions. They caramelize sugar in olive oil. Then, they add the onions and fry them. Next, they add grated garlic. After that, they put in the colored bell peppers. They sauté these vegetables for about 5 to 6 minutes. They season the mixture with salt, dried mixed Italian herbs, and black pepper. They sauté it for another 2 to 3 minutes. This creates a flavorful topping.
To assemble the sandwich, people place whole wheat bread slices into the maker. They spread the vegetable topping on the bread. Then, they sprinkle grated mozzarella cheese on top. Sliced green olives are an optional addition for extra flavor. They cook this in a pre-heated microwave oven using the Grill Mode. It takes about 6 to 7 minutes. The cheese melts beautifully. This creates a warm, savory sandwich.
You can also make many other vegan and vegetarian sandwiches. Try a simple hummus and roasted red pepper sandwich. Spread hummus on bread. Add roasted red peppers and some spinach. For a vegan “cheese” sandwich, use your favorite plant-based cheese slices. Add a slice of tomato or some thinly sliced avocado. A black bean burger patty, cut to fit, also makes a great filling. Just ensure it is pre-cooked.
💡 Tip: Always check the labels on bread and sauces. This ensures they fit your dietary needs. Many breads contain dairy or eggs.
Experiment with different vegetables. Mushrooms, zucchini, and eggplant all work well. You can sauté them first for more flavor. These variations show how versatile your microwave sandwich maker can be. It helps you create quick, satisfying meals for any diet.
Cleaning and Maintaining Your Microwave Sandwich Maker
Keeping your kitchen tools clean helps them last longer. It also ensures your food tastes great. Proper care for your microwave sandwich maker is simple.
Immediate Cleaning After Use
People should clean their microwave sandwich maker right after they use it. This prevents food from sticking. It also keeps the maker hygienic.
- First, let the appliance cool down completely. This prevents burns.
- Next, use a dry paper towel or a soft brush. Gently sweep away loose crumbs, cheese bits, or other food particles. Remove these from the cooking plates and surrounding areas.
- For non-stick cooking plates, use a damp cloth or sponge. Wipe them down simply. Use a soft touch to avoid scratching surfaces.
- Wipe the exterior casing with a slightly damp cloth. This removes splatters or fingerprints.
- Finally, use a clean, dry cloth. Wipe down all interior and exterior parts until they are completely dry. This prevents water spots, mineral buildup, or rust.
Dishwasher vs. Hand Washing Your Microwave Sandwich Maker
Some microwave sandwich makers are safe for dishwashers. Others need hand washing. Always check the manufacturer’s instructions first. Dishwasher-safe models offer convenience. However, hand washing often extends the life of the appliance. When hand washing, use warm, soapy water. A soft sponge works best. Avoid abrasive scrubbers. They can damage non-stick coatings. Rinse thoroughly and dry completely.
Storing Your Microwave Sandwich Maker
Store your clean and dry microwave sandwich maker in a convenient place. Many people keep it in a kitchen cabinet or pantry. Make sure it is completely dry before storing. This prevents mold or mildew growth. Some models are compact. They fit easily into smaller spaces. Storing it properly keeps it ready for your next delicious sandwich creation.
You can now enjoy making hot sandwiches quickly and easily. This guide prepared you to create delicious meals. Your microwave sandwich maker offers many possibilities. Keep experimenting with new ingredients and flavors. Try different breads, cheeses, and fillings. You will discover many new favorites. Enjoy every warm, tasty bite!
FAQ
🥪 Can people use any type of bread in a microwave sandwich maker?
No, people should use regular sliced sandwich bread. White or wheat bread works best. Avoid very thick or crusty breads. They might not fit well. They also might not heat through properly. Thin bagels or English muffins can also be good choices.
⏱️ How do people know when their sandwich is done?
The cheese should be melted and bubbly. The bread should look lightly toasted and feel warm. If it needs more cooking, microwave it for another 15 to 30 seconds. Always start with shorter times.
🥩 Can people put raw meat in their microwave sandwich maker?
No, people should not put raw meat in the microwave sandwich maker. Raw meats will not cook properly in the short microwave time. Always use pre-cooked meats like deli slices, cooked bacon, or pre-cooked chicken.
😩 What if a sandwich sticks to the maker?
People can prevent sticking. Butter the outside of the bread slices. This creates a barrier. A light coating of mayonnaise or cooking spray also works. Ensure the maker is clean before use. Food residue can cause sticking.
🧼 How do people clean their microwave sandwich maker?
People should let the maker cool down first. Then, they can wipe away loose crumbs. Use a damp cloth or sponge for the cooking plates. Wipe the exterior with a slightly damp cloth. Dry all parts completely before storing.